

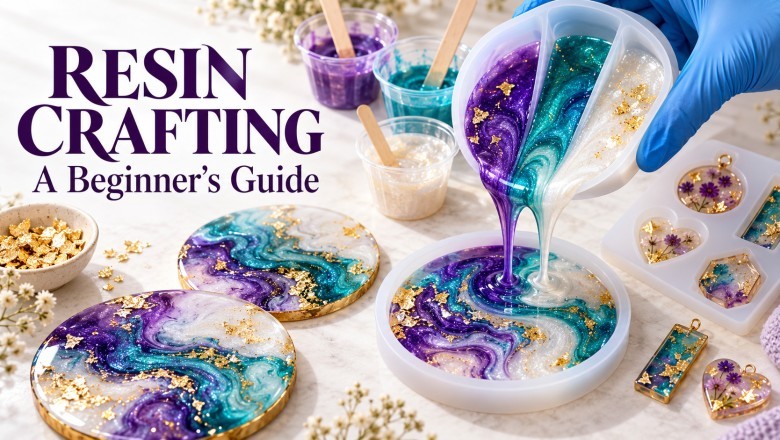

Creating with resin starts with a simple sequence: measure, mix, color, pour, remove bubbles, and cure. This reference sheet covers two-part epoxy resin used in silicone crafting molds.
Always follow your particular resin’s instructions. Mixing ratios, working times, maximum pour depths, and curing times vary between products.
Supplies
- Two-part epoxy resin suitable for your mold’s depth
- Clean, completely dry silicone molds
- Graduated measuring cups or a scale, as directed
- Mixing sticks and extra cups for colors
- Resin-compatible dyes, mica powders, or pigment pastes
- Nitrile gloves and safety glasses
- Protective covering for your work surface
- Toothpicks for details and trapped bubbles
- Optional divided pouring cup
- Optional heat gun, if permitted by the resin and mold manufacturers
- A dust cover that will not touch the wet resin
You could get this beginners kit to get you started and cut down the cost of buying everything separate.
1. Prepare Your Workspace
Work on a level, protected surface in a well-ventilated area, away from food, children, and pets. Arrange your supplies before mixing.
Wear gloves and eye protection. Follow the product’s safety data sheet for ventilation and any required respiratory protection. Low odor does not mean a product is harmless, and a dust mask does not protect against chemical vapors.
Keep molds and tools completely dry. Use crafting tools that will not return to food preparation.
2. Read the Product Instructions
Before opening the bottles, check:
- Mixing ratio: How much resin and hardener to combine.
- Measuring method: Whether the ratio is by volume or weight.
- Working time: How long you have to mix, color, and pour.
- Maximum batch size and pour depth: How much you can safely mix and pour at once.
- Temperature requirements: The recommended conditions for working and curing.
- Demolding and full cure times: When you can remove the piece and when it is ready for use.
A ratio by volume is not necessarily the same ratio by weight. Never add extra hardener to speed up curing.
3. Measure Carefully
Measure Part A and Part B exactly as directed.
For example, a product labeled 1:1 by volume requires equal volumes of the two parts. A product labeled 2:1 by volume requires two parts of the specified component to one part of the other.
Use measuring marks at eye level on a flat surface. If the instructions specify weight, use a suitable scale and the stated weight ratio.
Start with a small batch within the manufacturer’s limits.
4. Mix Slowly and Thoroughly
About three minutes is a common mixing recommendation, but use the time specified for your resin.
While mixing:
- Stir slowly and steadily rather than whipping.
- Scrape the sides and bottom of the cup repeatedly.
- Reach the bottom edge, where unmixed material can collect.
- Scrape the mixing stick against the inside of the cup periodically, then continue stirring.
Do not stop early just because the mixture looks clear. Thorough mixing is essential to prevent soft or sticky spots.
If your manufacturer recommends a two-cup method, transfer the mixture into a clean cup and mix again for the specified time.
Your working time starts when A and B meet—not when you start pouring.
5. Add Color
Fully mix the resin and hardener first. Then divide the mixed resin into separate cups, one for each color.
| Colorant | Typical appearance |
|---|---|
| Resin-compatible liquid dye | Transparent, stained-glass color |
| Resin-compatible mica powder | Shimmering or pearlescent color |
| Resin pigment paste | Strong, usually opaque color |
Start with a tiny amount and mix thoroughly. Add more gradually, staying within the manufacturer’s additive limit. Too much colorant can interfere with curing.
For beginner projects, avoid food coloring, ordinary craft paints, and unapproved liquid additives. Use alcohol inks only when the resin manufacturer confirms compatibility.
6. Use a Divided Pouring Cup
A divided pouring cup holds several prepared colors so they can pour together.
- Measure and fully mix A and B in a regular mixing cup.
- Divide the mixed resin into separate color cups.
- Add and mix each color.
- Transfer each colored portion into a different compartment of the divided cup.
- Tilt the cup and pour steadily into the mold.
Never put Part A in one compartment and Part B in another. They will not mix properly while pouring.
Begin with two colors. Pour into one spot for flowing bands, or move the cup gently to create ribbons.
The compartments separate colors inside the cup, but colors can blend once they enter the mold. Results depend on the resin’s thickness, pigments, and pouring technique. Do not wait until the resin becomes hot or nearly sets to try to sharpen the pattern.
7. Pour Into the Mold
Hold the spout reasonably close to the mold and pour in a thin, steady stream. For a simple mold, pour into one spot and let the resin spread.
For letters, points, or detailed shapes:
- Add a small amount of resin first.
- Use a toothpick to guide it into corners and details.
- Release visible air pockets.
- Continue filling the mold.
Stay within the resin’s maximum pour depth. Deep molds may require a different casting resin or layers poured according to the product’s instructions.
8. Remove Bubbles Gently
Use a toothpick to pop visible bubbles or ease trapped air out of corners.
If both the resin and mold instructions allow heat, make a brief, moving pass with a heat gun at an appropriate low setting. Keep it moving and avoid lingering near mold edges.
Too much heat can damage silicone, move colors, and accelerate curing. A torch or lighter is best avoided for beginner silicone-mold projects. Never use flame around flammable additives.
Surface heat will not reliably remove bubbles trapped deep inside a casting.
9. Cover and Cure
Place a dust cover over the mold without touching the resin. Leave it level and undisturbed at the recommended temperature.
Follow the stated demolding time. Peel the flexible mold away gently rather than forcing the piece out.
Demolding time and full cure time are different. A piece may feel firm enough to remove but still need additional time before regular use.
If the resin remains unusually soft or sticky beyond its expected cure time, check the ratio, mixing, additives, and curing temperature. Do not pour extra hardener over it.
10. Clean Up Safely
Keep uncured resin off your skin. If contact occurs, wash promptly with soap and water. Do not clean your skin with solvents.
Never pour resin or hardener down a drain. Follow the product’s disposal instructions and local requirements.
Mixed resin produces heat. Do not leave a large batch concentrated in a deep cup, where it can become dangerously hot. Follow the manufacturer’s directions for leftover material.
Common Beginner Mistakes
- Confusing volume ratios with weight ratios
- Guessing measurements
- Mixing too briefly or missing the cup’s bottom and sides
- Adding too much pigment
- Using damp molds or decorations
- Mixing more resin than can be poured within the working time
- Exceeding the maximum pour depth
- Applying too much heat
- Removing the piece before it is ready
A Good First Project
Choose a small, shallow mold approved for your resin and use one color. Once you are comfortable measuring, mixing, and pouring, try two colors in a divided cup.
Quick reminder: Prepare → Measure → Mix → Divide → Color → Pour → Check bubbles → Cover → Cure.
Resin Basics
How to use epoxy resin for complete beginners
Using Temporary Tattoo's
25 Easy Resin Products Anyone Can Start Selling This Month