

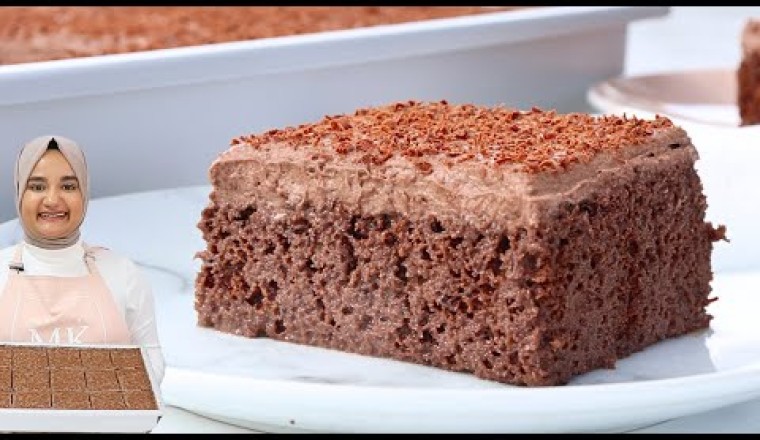

This Chocolate Tres Leches Cake is a dreamy twist on the classic! It features a soft, airy chocolate sponge that’s soaked in a rich chocolate milk, then topped with a light and luscious chocolate whipped cream frosting. Every bite is incredibly moist, chocolatey, and just the right balance of indulgent and refreshing!
INGREDIENTS
Chocolate Sponge Cake
- ¾ cup (90 g) all-purpose flour - plain flour in the UK
- ¼ cup (30 g) cornstarch
- ¼ cup unsweetened cocoa powder - I use Dutch-processed cocoa
- 1 tsp instant coffee powder
- 1½ tsps baking powder
- ¼ tsp salt
- 5 large eggs - room temperature, white and yolks separated
- 1 cup (200 g) white granulated sugar - separated in half: ½ cup (100g) for the egg whites & ½ cup (100g) for the egg yolk mixture
- 1½ tbsps warm water - not boiling
- 2 tsps vanilla extract/essence
- 2 tbsps (30 g) unflavored vegetable oil - I use canola oil
Chocolate Milk Mixture
- 1¾ cups (425 g) evaporated milk - You will need two 12 oz cans (there will be some left over)
- 1 cup (305 g) sweetened condensed milk - You will need one 14 oz can (there will be a little left over)
- ¾ cup (180 g) heavy cream
- 2 tbsp (14 g) unsweetened cocoa powder - I use Dutch-processed cocoa
Stabilized Chocolate Whipped Cream (or see note 1 for simple whipped cream recipe)
- 1 cup (225 g) mascarpone - cold
- ½ cup (55 g) powdered sugar - also known as icing/confectioners' sugar
- 3 tbsp (20 g) unsweetened cocoa powder - I use Dutch-processed cocoa
- 1 tsp vanilla essence/extract
- 1½ cups (335 g) heavy cream - cold
Extra for Decorating (Optional)
- semi-sweet chocolate - finely grated, for garnishing if desired
DIRECTIONS
Chocolate Sponge Cake
- Preheat oven to 180°C (350°F) conventional (see note 2 if using a convection oven with a fan) and lightly grease only the bottom of a 9x13-inch cake pan. Leave the sides of the pan ungreased and do not line them (see note 3).
- Sift together flour, cornstarch, cocoa powder, instant coffee powder, baking powder and salt. Mix until well combined and set aside.
- In a medium sized bowl add in egg whites and using a hand or stand mixer, whip on a medium-high speed for 30 seconds until foamy (see note 4). Once foamy, gradually add in ½ cup (100g) of the sugar and then continue mixing until you reach stiff peaks (this should take about 4-6 minutes). Set aside.
- In a large bowl, combine the remaining ½ cup (100g) of sugar with the warm water. Stir to coat the sugar. Add the egg yolks and vanilla, then whip on medium-high speed for about 2 minutes, until the yolks are pale and slightly thickened.
- While mixing on medium speed, slowly stream in the vegetable oil. Mix until well combined.
- Fold in half of the whipped egg whites into the yolk mixture using a spatula, being careful not to overmix. Next, gently fold in the sifted dry ingredients. Finally, fold in the remaining egg whites until just combined. If there are large chunks of egg white, gently break them up by pressing them against the side of the bowl with your spatula—but avoid overmixing and deflating the batter.
- Pour the batter into the prepared cake pan and spread it out evenly. Run a toothpick or thin knife through the batter to pop any large air bubbles. Lightly tap the cake tin on the counter twice to release excess air, then bake for 25 minutes. The cake is done when the top springs back slowly after a gentle touch.
- Once baked, immediately drop the cake tin from a height of about 10cm onto your counter to help release steam. Then, invert the cake tin (with the cake still inside) onto a wire rack and let it cool for 30 minutes (see note 5).
Chocolate Milk Mixture
- In a jug (or any pour-friendly container), combine the evaporated milk, condensed milk, and heavy cream. Sift in the cocoa powder and whisk until well combined. If you notice lumps of cocoa sitting on top, let the mixture sit for a few minutes and whisk again. Most lumps should dissolve—don’t worry if a few small ones remain, as long as there are no large clumps of unmixed cocoa.
- Once the sponge has cooled for 30 minutes, turn it upright and run a knife along the edges of the tin to release the cake.
- Use your fingers to gently rub off the top layer of brown 'skin' on the sponge (see video for demonstration). Then, use a fork to poke holes all over the top—about ¾ of the way into the sponge (not all the way to the bottom).
- Pour the milk mixture evenly over the cake, making sure the top and edges are well soaked.
- Cover the cake with cling wrap and refrigerate for at least 2 hours to allow the milk to soak in adequately.
Chocolate Stabilized Whipped Cream Frosting
- Once the cake is ready to serve, prepare the whipped cream frosting.
- In a large bowl, combine the mascarpone, powdered sugar, cocoa, and vanilla. Mix on low speed for 5 seconds, then increase to medium-high and beat until well combined. (If using a stand mixer, use the whisk attachment.)
- Add the heavy cream and mix on low speed for 10 seconds to prevent splattering. Then, increase to medium-high speed and whip until stiff peaks form. Watch carefully to avoid overwhipping.
- Spread the whipped cream evenly over the cake. Garnish with finely grated semi-sweet chocolate, if desired. Slice and enjoy!
NOTES
- If you prefer a non-stabilized whipped cream frosting, you can use the following recipe:
- 2 cups (480g) heavy cream
- 2 tbsps white sugar
- 2 tbsps (14g) cocoa powder
- 1 tsp vanilla extract
- Whip all ingredients together until stiff peaks form. Be careful not to overwhip.
- If using a convection oven with a fan, reduce the temperature to 160°C (320°F).
- Leaving the sides of the cake pan ungreased helps the sponge cling to the sides as it rises, which improves structure. After baking, the cake is inverted to cool upside down—because the edges of the cake stick to the pan, it won’t fall out. This technique helps maintain the sponge’s light and fluffy texture.
- Make sure your bowl and mixer attachments are completely clean and free from fat or grease when whipping egg whites. Any fat residue, including yolk, will prevent them from reaching stiff peaks. Also, if using a stand mixer, use the whisk attachment.
- Cooling the sponge upside down (while still in the tin) prevents it from deflating, helping to maintain its airy texture.