

Do you have a favorite season? Mine is, without a doubt, Fall. Maybe it’s the slightly cooler temperature or the almost-ready-to-jump-in leaf piles accumulating in my backyard, or perhaps it’s the sweet aroma of Pumpkin Spice Lattes wafting out of Starbucks that makes me feel positively giddy. One thing’s for certain, I’m here for it. Bring on the cozy sweaters, warm spiced drinks, and pumpkin decorations!
Enter: A pumpkin spice acrylic flip cup pour to kick off my favorite season.


For my pour, I opted for a purple aesthetic that will complement my Halloween decorations nicely. If you’re looking for a traditional Fall color palette, I would recommend a blend of orange, yellow, green, and brown. After all, a nature inspired color palette is never a bad idea! I chose the colors from Pouring Masters (Royal Purple, Wild Rose Magenta, Baby Blue, and 24 Karat Gold Metallic) because they pour so beautifully.
Here are the materials you will need.
Wooden craft pumpkin: I found this blank 3-D wooden pumpkin set for $5.00 at my local Dollar Tree, but this set of 4 is cheaper at Amazon and you just simply pour over it the traditional colors–or use it in your design!
Paints:
Supplies:
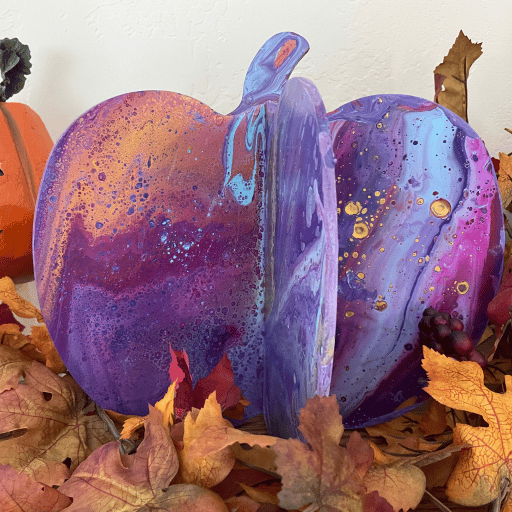
I’ll admit, I’m a sucker for the flip cup technique—the colors just seem to blend and spread like butter across a hot skillet. This pour is no exception.
I poured equal layers of each color into a cup, with the exception of Royal Purple. I wanted the majority of my pumpkin to be purple to match my Halloween decorations.
My 3D pumpkin is made up of 3 pieces, which I laid out across my station. On Day 1, I poured the front of all 3 pumpkin pieces. I left these to dry overnight. On Day 2, I poured the back sides. If I could do it over, I would have covered the front sides with something to protect them from excess paint dripping when I poured on the back sides.
I first laid one pumpkin piece on top of my cup, then, I flipped my pumpkin piece and my cup upside down and picked up my cup, releasing my paint. Due to the size of my pumpkin and the gap in the middle of each piece, I had to perform 2 flip-cup pours on each piece to cover one side. I let my pieces dry overnight before I performed another set of flip-cup pours on the back.
As an experiment, I torched the back sides of each pumpkin piece to create more cells. I’m pleased with the results but I discovered I like my pumpkin spice acrylic pour without cells. If you feel similarly and prefer the look of clean lines, you can read How to Get a Cell Free Acrylic Pour.
How did your pumpkin pour turn out?
Acrylic Pouring staff is made up of aritists and writers from around the world. We take information from our own experiences, tests, and research what works best from our Facebook Group and other top artists. Join our Facebook Group to get insight from other top artists and find out about giveaways. Follow us on Instagram for top acrylic pours and tips, and check out our Pinterest for some of our favorite pouring and fluid art tutorials from around the web!


Comments
0 comment